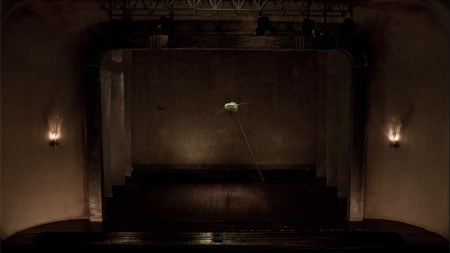
Important Note: The film above is uploaded in HD, so you MUST see it scaled up to fullscreen mode! Click the arrows on the bottom right to scale up… or watch on Vimeo here.
So, here’s a bit of news. I just finished a second short film! This one is much, much shorter than Little Theatres, of course, and was done for a local art show, at Resistor Gallery. The film was conceived of and boarded, with its elements built, lit, and shot, its titles designed, sound recorded, and other fiddly post work fiddled with… ALL over the course of a week and a half.
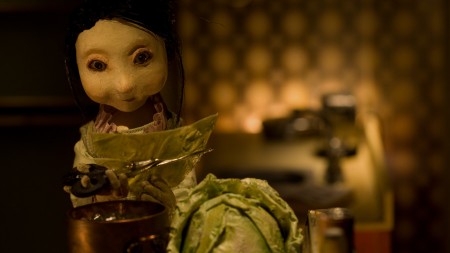
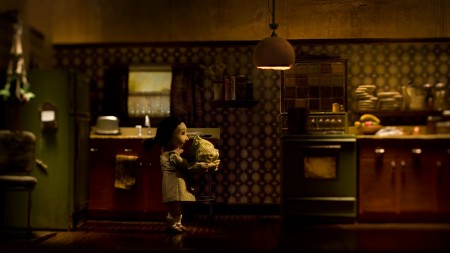
The film is shown above, and it’s called Krampusnacht, the Quietest. The theme of the art show was Krampus, who is an interesting character — a demon who comes out at Christmastime to punish bad children. You can read more about him here…
But I wanted to show finished animation here on this blog! Isn’t it exciting! Finally, there is an animated, non work-in-progress piece that I can show.
I also wanted to write a post of my process — how did I actually complete an entire (though short!) stop motion film in 9 days? HOW? That’s crazy!
There were a couple of tricks… first, I re-used a puppet from Little Theatres. And a chair. So that cut down on quite a bit of time. But the rest of the sets and props were built from scratch. Second, I edited the film using a bounce loop. How tricky! This means that the film plays forward, then the footage plays back in reverse. I shot the film so that it COULD be played normally, and end with a fade out at the end… but it just seemed more interesting with the loop. Also it allowed me to make the film longer, with little effort, and allowed for more of the music to play. (And I really love this music.)
Here’s how it came together, day by day:
Day 1:Â Concept
Here’s where I usually get bogged down, overthinking things and planning and replanning and spinning my wheels. Because there was so little time, I had to come up with an idea fairly quickly, and not think about it too much. So I drew inspiration almost instantly by doing the things I normally do… poking around various design / art blogs, and looking at stuff around the house.
So the first very clear influences that triggered the images shown in the film were: a picture hanging in my office, and a photo I came across while reading the blogs in my RSS feed that day. Both are shown below (click to enlarge):
On the left is a painting called Grammar Two, by James Jean. One of my favourite artists… and I have always loved this painting. It gave me the idea to have the little girl (Abigail) pull the Krampus bits out of a gridded box.
The image on the right is from a great little blog created by local shop owners, who feature works by (mostly Scandinavian) artists and craftspeople — Kitka Design Toronto. The pic is from this post, and I knew right away when I saw it that I needed to string together Krampus bones (or is it the bones of little children…? Mwahahahaha) and drag the Krampus fur along the floor with them.
Day 2:Â Storyboarding, Gathering the Materials
I am not really a storyboard artist AT ALL. Luckily I do not have to sell the story to a client in this case — I’m just trying to clarify ideas for myself, and nobody else. So I try to break the film down shot by shot, and clarify the framing, as well as the action in each shot.
Here’s what I came up with on this day, after mulling things over for a while in my head (click click):
So this gets the story going, and the basic framing decided, and the general actions of each scene. I figured here that there would be 4 shots, which I basically stuck to, more or less. I crossed out the third frame due to time restrictions — how am I going to make the puppet walk across the room, when she isn’t rigged for walking? Nixed. Also in what became the third shot, I decided against the disembodied hands reaching through the wall, and instead had Krampus jump through the wall on his own, dragging his bones rather than having the bones pull him.
I based the final scene on a painting I once started, a few years ago, and never finished, of a fur coat hanging on a tree in the middle of an empty landscape… It was nice to be able to recreate this image for something else! And to finish it! But in the “boards” above I had described this tree as spinning on a platform — again, this idea was cut out, due to time restraints.
Also, I did not end up making Krampus mucky and gross… probably due to keeping it simple, and being constrained by time, again.
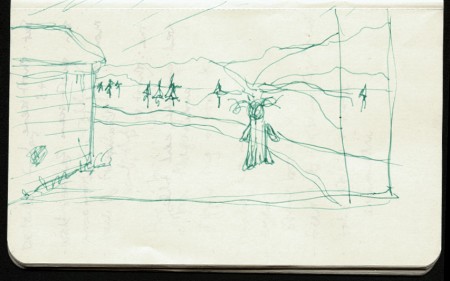
Here’s a sketch where I refined the composition a little, for the final scene. I carry this little notebook with me, and sketched this up on a crowded subway one morning. The wheels were churning constantly… I have to be ready to draw things out, so I like carrying around a little book like this. Especially when I’m stressed — keeping lists and notes and drawings really helps me organize my thoughts and calm down a little.
Once I had the scenes clarified, I picked up some materials for building the sets, props, and Krampus puppet:Â some clear and ivory fimo for the bones, some fake fur for the creature, and some fabrics for the carpet and wallpaper.
Days 3 & 4:Â Building and Lighting the First Set
I spent long hours these two days building all the elements I’d need to shoot the first three scenes. I figured I’d build the landscape set for the final shot after I shoot the scenes, just in case I was to run out of time, or in case the story changed somehow at the last minute. Basically just wanted to get the first three scenes completely out of the way before tackling a landscape build.
So on these days I made: tiny bones, the gridded box, the fireplace, the “fire” (I used sheets of copper to make this), the two walls, the fireplace, the furry monster, the mounted horns, and the carpet. The wooden floor is also from Little Theatres, along with the white chair in the corner…
Once built, I started playing around with lighting. The scene is entirely lit using my little LED strips on dimmers and the homemade softboxes. Two of the LEDs were on the floor, in the shot… so I had to edit them out in post. Which was easy as there were no camera moves. (The ‘camera move’ in scene 3 was done in post… Normally I would not have gone that route, but again, just trying to save time. And I doubt anyone but me really notices…?)
Days 5 & 6:Â Shooting Scenes 1-3
I did up a quick animatic in the morning of my first shoot day — taking stills of the set, roughing out the camera angles, and then assembling them in AE. This way I knew exactly how long each scene would be… and I pretty much stuck to this scene length, to the frame. (No time to shoot any handles!)
Since these first 3 scenes had pretty much the same lighting setup, I just went through and shot them all in a row… actually in the order that they appear. So on the first shoot day I shot scenes one and two, since the second one was pretty short… Then the next day shot scene 3. It all went smoothly! It’s pretty amazing what severe time pressures can do… I guess I work well in those circumstances 🙂
Day 7:Â Building and Lighting the Landscape Set for Scene 4
This was by far the most stressful day of the whole process. I had never built a landscape set before. I decided early on that the key would be to construct it under camera… Meaning, I set the camera up FIRST, then added pieces, one at a time. I’m really fussy about composition, and for some reason landscapes seem really particular, in terms of balancing out the sky vs. the ground, and having the tree branches fall at the right angle, etc. So the only way to really preview this was to set up the camera, and build while viewing the scene through that framing. I think it turned out OK, but would have LOVED to have had more time to finesse it. I think the mountains are lame (they are flat cardboard cutouts), I could have done a MUCH better job on the sky painting, and the trees are not that great, but hey… I built it in ONE DAY!
Though I have never built a landscape, I really admire landscape miniature artwork. There are two such artists that I know of and admire — actually one who I just found out about today (thanks Rob P!) — Adam Makarenko, a fellow Torontonian, and Kim Keever. My landscape above is embarrassing by comparison, but I will get there one day… in my own time.)  ONE DAY!
Day 8:Â Shooting Scene 4
I knew this scene would be easiest shot backwards, so that’s what I did. It went totally smoothly… I propped the Krampus figure up onto the tree, then just touched his fur, frame by frame, to randomize it as if it was blowing in the wind… then gradually slinked him down the tree. In reverse, it looks OK. I always find it tricky shooting in reverse, as I can’t preview what it will actually look like when played the right way around. But it turned out OK, and in this case it doesn’t matter because it is played both ways anyway.
Day 9:Â Post Production
This was my day for sound recording, sound design, title design, and comping. Gulp. Actually it sounds like a lot but it was totally easy… I knew exactly what I wanted to do music-wise, and for me, title design and this kind of easy comp work is the point where “it’s all downhill from here.” (In a good way. What does that phrase really mean, anyway? I am using in the riding-a-bike sense — the work is suddenly a lot easier. But I guess that was obvious…)
I recorded the sound using my new obsession gadget, the iPad. I didn’t even know it had a mic in it, but oh yes! It does. So of course it’s a mono recording, and if you listen closely in a fancy surround-sound setup it’s probably pretty bad, but hey, I had a few hours to select and edit the music! It was the best I could do.
So the sound was recorded with the iPad being held up to a Regina music box — an old music box from the late 1800s, which plays metal records. (More about that here.)  It was passed down through my family from my great-grandparents, and it’s now sitting in our dining room. I’ve always wanted to use it for something like this! My mom has collected records for it over the years. So I sifted through a stack of 50 or so records, looking for just the right tune. I didn’t listen to all of them, because it’s pretty tedious to crank the box and wait for the song to finish before removing it… so I only listened to the ones with interesting titles, or by German composers… (trying to stay somewhat true to the origins of Krampus…)
In the end, Hungarian Melody was the right tune for this project.
For sound design, which I kept extremely simple, I decided on the fire and wind sounds, finding free downloads online.
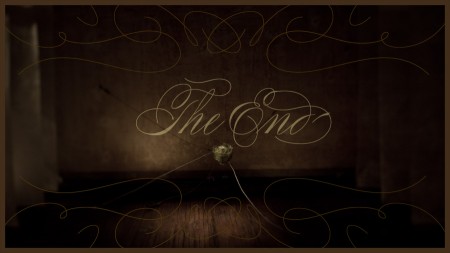
Then, titles… used my current favourite fonts and their embellishments…Â Added a vignetting and some flicker in AE.
So that’s pretty much it… the other post work was boring, just editing out lights, adding fog, adding a BIT more colour to the sky (cheat! cheat!) and that sorta thing. Darkening some areas, lightening others. Time remapping a bit here and there.
Hope you enjoyed this runthrough of how to make a film in 9 days! Which I do not recommend doing, by the way. But, it can be done.
Krampusnacht is this Sunday… have a very merry Krampusweekend!


